 Oct 28, 2025 - 0
Minutes read
Oct 28, 2025 - 0
Minutes read
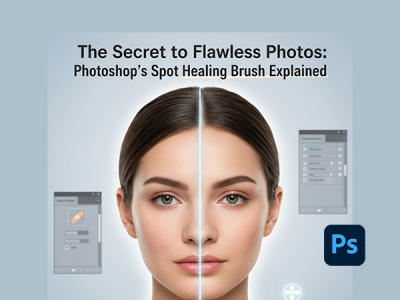
The Secret to Flawless Photos: Photoshop's Spot Healing Brush Explained
Introduction: The Magic Behind Perfect Photos

Behind every stunning, polished photo lie a few subtle edits—and one of the most powerful tools for achieving those flawless results is Photoshop’s Spot Healing Brush. Trusted by photographers, designers, and retouchers alike, this intuitive feature makes it effortless to remove blemishes, dust spots, and distractions with just a click.
Some of our links may be affiliate links and if you buy through our link, we might generate some commissions.

What Is the Spot Healing Brush Tool?
The Spot Healing Brush in Adobe Photoshop is a smart, AI-powered retouching tool that removes small imperfections with ease while keeping your edits natural and seamless. Instead of manually cloning or blending, the tool automatically analyzes the surrounding area and replaces unwanted spots, scratches, or distractions with perfectly matched pixels—preserving your image’s original texture, lighting, and tone.
Discover Adobe's suite of products.

Where to Find It: Getting Started in Photoshop
Locating and using the Spot Healing Brush Tool in Adobe Photoshop is simple, even if you’re new to photo retouching.
1. Locating the Spot Healing Brush
Open your image in Photoshop and look for the Healing tools group in the toolbar (represented by a bandage icon).
Right-click or click and hold the icon to open the flyout menu, then select Spot Healing Brush Tool.
You can also press J on your keyboard for quick access.
Once selected, you’ll see options in the top menu bar—like Brush Size, Mode, and Type (Proximity Match, Create Texture, or Content-Aware)—to fine-tune how Photoshop blends pixels.
2. Spot Healing vs. Healing Brush vs. Clone Stamp
While these tools share similar goals, each offers a different level of control:
Spot Healing Brush Tool – The fastest, most automated option. Just click or paint over a blemish, and Photoshop fills it in using nearby pixels. Ideal for small flaws like dust spots or skin blemishes.
Healing Brush Tool – Offers more manual control. You choose a source area (Alt/Option + Click), and Photoshop blends it into the target area—perfect for larger or textured repairs.
Clone Stamp Tool – Provides full manual precision by directly copying pixels from one area to another. It’s best for detailed restoration or areas requiring exact duplication.
3. Choosing the Right Tool
For most quick cleanups, the Spot Healing Brush is your go-to—it’s fast, intuitive, and powered by Photoshop’s Content-Aware intelligence. For more complex or texture-specific fixes, switch to the Healing Brush or Clone Stamp for added control.
By understanding where to find these tools and when to use them, you’ll be equipped to handle any retouching task—keeping every image clean, balanced, and professional.
Discover Adobe's suite of products.

How It Works: The AI Behind Seamless Retouching
What makes Photoshop’s Spot Healing Brush Tool so powerful is the intelligent technology working behind the scenes. Here’s what happens when you click or brush over a blemish: Photoshop instantly examines the texture, color, tone, and lighting of the pixels around the targeted area. It then generates new pixels that match those characteristics, blending them perfectly into the rest of the image. This allows even complex areas—like skin gradients, fabric patterns, or textured surfaces—to be corrected without visible seams or artifacts.
Proximity Match: Samples pixels directly adjacent to the area being fixed—great for small, simple imperfections.
Create Texture: Builds a new texture based on nearby patterns, ideal for surfaces like fabric, skin, or walls.
Content-Aware: The most advanced option, which intelligently blends color, tone, and texture from a broader area to create the most realistic fill.

Step-by-Step: Retouching Your First Photo
Using Photoshop’s Spot Healing Brush Tool is quick, intuitive, and ideal for both beginners and professionals.
1. Select the Spot Healing Brush Tool
Open your image in Adobe Photoshop and select the Spot Healing Brush Tool from the toolbar (it looks like a bandage icon).
If it’s hidden, click and hold on the Healing Brush Tool to reveal a dropdown, then choose Spot Healing Brush.
Or simply press J on your keyboard to activate it instantly.
2. Adjust Brush Size and Hardness
In the Options bar at the top, fine-tune your brush settings:
Set the brush size slightly larger than the blemish or imperfection you’re correcting.
Use a soft edge (low hardness) for smoother blending, especially on skin or textured surfaces.
Choose the Content-Aware type (in the same Options bar) for the most natural, intelligent fills.
You can also adjust the brush size quickly by pressing the [ or ] keys on your keyboard.
3. Click or Drag Over the Area to Remove Blemishes
Once your brush is set, simply click once on small imperfections like pimples, dust spots, or scratches. For longer marks—like wrinkles or stray hairs—click and drag gently across the area. Photoshop’s content-aware AI will automatically sample and blend surrounding pixels to remove the distraction seamlessly.
4. Review and Fine-Tune the Results
Zoom in and inspect your edits closely. If an area doesn’t blend perfectly, undo the last action (Ctrl+Z / Cmd+Z) and try again with a slightly different brush size or hardness. For subtle refinements, combine the Spot Healing Brush with the Clone Stamp or Healing Brush to maintain texture consistency in tricky spots.
Pro Tip:
For nondestructive editing, apply your retouches on a new blank layer above your image. Check “Sample All Layers” in the options bar so Photoshop uses the underlying image as a reference while keeping your edits separate and reversible.
Discover Adobe's suite of products.

Pro Tips: Getting Natural, Realistic Edits
These expert tips will help you refine your technique and keep every edit looking clean, subtle, and believable.
1. Work on a New Layer (Non-Destructive Editing)
Before you start, create a new blank layer above your image and check Sample All Layers in the Options bar. This lets Photoshop pull data from the original image while keeping your edits separate—so you can adjust opacity, mask, or delete corrections anytime without affecting the base photo.
2. Zoom In for Detail, Zoom Out for Balance
Zoom in (Ctrl/Cmd +) to fix fine details like blemishes or dust, but zoom out regularly to check your overall composition. This ensures your edits blend naturally at full view and prevents over-smoothing or unnatural texture.
3. Use Small, Controlled Strokes
For best results, click or dab lightly instead of dragging long strokes. Smaller strokes give Photoshop a more accurate sample area, producing smoother and more realistic blends—especially on skin or detailed surfaces.
4. Match Brush Size to the Imperfection
Keep your brush just slightly larger than the flaw you’re fixing. Oversized brushes may pull in unwanted tones, while smaller ones can leave edges visible. Use the [ and ] keys to adjust brush size quickly as you work.
5. Preserve Natural Texture
Don’t erase all imperfections—texture is what makes an image feel real. After removing distractions, lightly restore surface detail with a low-opacity Clone Stamp or Healing Brush for a natural finish.
6. Combine Tools for Complex Fixes
For trickier areas—like wrinkles, patterns, or gradient backgrounds—mix the Spot Healing Brush with the Patch Tool, Healing Brush, or Clone Stamp. Using multiple tools gives you finer control and cleaner results.
Discover Adobe's suite of products.

Common Mistakes to Avoid When Using the Spot Healing Brush
While Photoshop’s Spot Healing Brush Tool is easy to use, small missteps can quickly turn natural retouching into over-editing. To keep your photos looking authentic and polished, watch out for these common pitfalls.
1. Overusing the Tool
It’s tempting to remove every mark, but over-editing can erase natural texture and character. Focus on major distractions—like blemishes or dust spots—and leave subtle details that make your subject look real.
2. Ignoring Lighting and Shadows
The tool’s AI blends tones automatically, but inconsistent lighting can reveal edits. When working near highlights or shadows, make sure the generated fill matches the original direction and intensity of light to maintain depth.
3. Using the Wrong Brush Size
A brush that’s too large can pull in unwanted pixels, while one that’s too small can leave visible edges. Set your brush just slightly larger than the imperfection, and use the [ and ] keys to adjust quickly as you work.
4. Editing Directly on the Original Layer
Always retouch on a new blank layer with Sample All Layers enabled. This nondestructive workflow gives you the flexibility to adjust or undo edits without affecting the original image.
5. Working with Low-Resolution Images
Low-res files limit Photoshop’s ability to blend textures accurately, leading to blurry or patchy results. For best performance, use high-resolution photos so the AI has enough data to work with.
6. Forgetting to Check the Whole Image
Zooming in helps with precision, but zoom out regularly to see how your edits look overall. What appears smooth up close might feel flat or artificial from a distance.
7. Relying on One Tool for Everything
The Spot Healing Brush is powerful but not perfect for every scenario. For larger or more complex fixes, combine it with tools like the Healing Brush, Patch Tool, or Clone Stamp for greater control.
Discover Adobe's suite of products.

Conclusion: Perfecting Your Photos with Confidence
Photoshop’s Spot Healing Brush Tool proves that professional-quality retouching doesn’t have to be complex. With just a few clicks, you can remove distractions, smooth imperfections, and bring out the best in every image—while preserving its natural texture, tone, and character.
Discover Adobe's suite of products.
What makes this tool so powerful is its versatility. Paired with tools like the Healing Brush, Clone Stamp, or Patch Tool, it offers complete creative control for everything from quick touch-ups to advanced restorations. With precision, simplicity, and a touch of creativity, it helps you retouch with confidence and create photos that look effortlessly professional.