 Nov 05, 2025 - 0
Minutes read
Nov 05, 2025 - 0
Minutes read
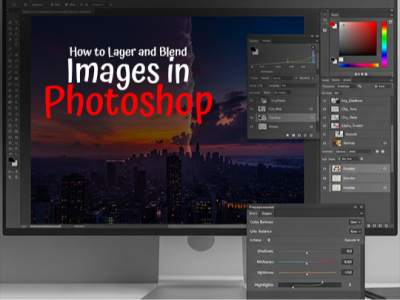
From Concept to Composite: How to Layer and Blend Images in Photoshop

Turning Ideas Into Visual Stories
Every powerful digital composite begins with a concept—a story or emotion ready to take form. Photoshop turns those ideas into visual narratives, blending imagination with technique.
Start with a clear intention: define the message or mood before creating. This vision guides every decision—from composition and color to texture and light.
Photoshop acts as the bridge between concept and creation. Layers, masks, and blending modes let artists merge elements seamlessly, while adjustments refine tone and cohesion.
Its strength lies in experimentation—every layer invites new possibilities. Through refining light, contrast, and detail, creators shape images that truly resonate.
In the end, visual storytelling is about connection—transforming ideas into images that speak with depth and emotion.
Some of our links may be affiliate links and if you buy through our link, we might generate some commissions.

Building Your Base: Working with Layers
A strong layer structure is the foundation of every Photoshop composite. Layers act as the building blocks of your artwork—each one editable and adjustable without affecting the rest of the image. Managing them effectively ensures flexibility and control throughout your process.
Think of layers as transparent sheets stacked to form a visual hierarchy. Organize them strategically—group backgrounds, subjects, and adjustments—to keep complex projects clear and navigable.
Maintain efficiency with a clean, labeled layer setup. Descriptive names like "Sky Texture" or "Main Subject Shadow" prevent confusion, while grouping and color coding keep your workspace tidy and focused.
Use adjustment layers and masks for nondestructive editing. They let you refine tone, color, and contrast without altering your originals, preserving creative freedom as your concept evolves.
A well-organized layer structure makes blending and refinement intuitive, allowing you to focus on what matters most—storytelling, mood, and artistic expression.
Discover Adobe's suite of products.

The Art of Blending: Mastering Blend Modes
Blending is where technical precision meets creativity—the moment separate images merge into a single, cohesive scene. In Photoshop, blend modes control how layers interact, shaping light, color, and texture to define the mood and realism of your composite.
Blend modes are grouped by function:
- Darken modes (Multiply, Color Burn) deepen shadows and anchor elements naturally.
- Lighten modes (Screen, Linear Dodge) enhance highlights and light effects.
- Contrast modes (Overlay, Soft Light, Hard Light) boost midtones for added depth.
- Color and luminosity modes adjust hue, saturation, and brightness independently for color harmony.
The key to mastering blend modes is experimentation. Test different settings, observe their effects, and fine-tune with layer masks for precision. For instance, Soft Light can add atmosphere, while Multiply enhances realism in shadows.
Always align blends with your scene’s lighting and color temperature. Adjusting opacity or pairing a blend mode with an adjustment layer can smooth transitions and maintain balance.
Used thoughtfully, blend modes become creative instruments—tools that unite elements with harmony, transforming composites into images that feel both believable and expressive.
Discover Adobe's suite of products.

Precision and Control: Masking Techniques That Matter
Once your layers are set, true compositing finesse comes from seamless blending—and that’s where masking shines. Masks offer precision and flexibility, letting you control visibility without erasing pixels. This nondestructive method keeps every edit reversible as your composition evolves.
A layer mask works like a grayscale filter: black hides, white reveals, and gray adjusts transparency. This allows you to merge elements, blend textures, or refine selective areas cleanly. For newcomers, mastering brushes and gradients within masks is the first step toward natural, realistic composites.
For complex projects, Photoshop’s advanced masking tools refine edges with remarkable accuracy. The Select and Mask workspace captures fine details like hair or fabric, vector masks provide crisp edges for design elements, and channel-based masks isolate subjects using tonal contrast.
To achieve smooth transitions, use feathering and density adjustments to soften edges. Layer multiple masks or link them to adjustment layers for precise control over lighting, shadows, and color balance.
Masking isn’t just technical—it’s what gives your artwork polish and realism. By mastering masks to shape light and refine boundaries, you can blend elements effortlessly, creating composites that feel seamless and alive.
Discover Adobe's suite of products.

Light, Shadow, and Realism
No matter how precisely layers are arranged or blended, a composite only feels believable when light and shadow work in harmony. Consistent lighting and color are what transform separate images into a unified, realistic scene. Photoshop’s tools make it possible to fine-tune these elements with precision.
Start by assessing light direction and intensity in each source image. Align highlights and shadows using Curves or Levels for brightness and contrast adjustments. Subtle dodge and burn work can sculpt dimension and ensure light behaves naturally across your composition.
Next, refine color balance. Even minor temperature shifts—warm versus cool tones—can break cohesion. Use Color Balance, Hue/Saturation, or Selective Color layers to align hues, starting with midtones, then adjusting highlights and shadows. A global color grade can further unify the mood and atmosphere.
Shadows are what ground your subjects. Match their direction, sharpness, and falloff to the scene’s light source. Create cast shadows on a new layer set to Multiply, then adjust opacity and blur for realistic diffusion.
Finally, step back and check overall light balance. The goal isn’t perfect symmetry but believable lighting logic that supports your visual story. When light, shadow, and color align, your composite evolves from a collection of images into a cohesive, lifelike scene.
Discover Adobe's suite of products.

Adding Depth with Adjustment Layers
Once your composition is in place, adjustment layers become essential for refining tone, contrast, and color—ensuring every element feels part of the same scene. These nondestructive tools sit above your image layers, letting you make flexible, reversible edits that enhance overall cohesion.
Start with tonal balance. Use Levels or Curves to align exposure and contrast, bringing shadows and highlights into harmony. For subtle cinematic depth, try combining these with Soft Light or Overlay blend modes at low opacity.
Next, focus on color harmony. Adjustment layers like Color Balance, Hue/Saturation, and Selective Color help unify temperature and tone across elements. To build atmosphere, apply Gradient Maps or Photo Filters that tie the entire scene together with a shared tint or lighting feel.
For a polished finish, add a global color grade—a Color Lookup adjustment at the top of your stack can unify the overall tone and give your composite a professional edge.
Adjustment layers aren’t just corrective; they’re creative tools for depth and cohesion. By mastering tone, color, and contrast, you transform multiple images into a seamless, expressive composition that feels balanced and emotionally resonant.
Discover Adobe's suite of products.

Final Polish: Textures, Filters, and Creative Finishing Touches
With your composition complete, the final stage focuses on refinement and cohesion—transforming a solid composite into a visually compelling piece.
Textures: Adding Depth and Realism
- Use textures to unify elements and enhance atmosphere.
- Try overlays like paper grain, fabric weave, or film noise.
- Apply with Soft Light, Overlay, or Multiply blend modes.
- Adjust opacity and use layer masks to control visibility and keep effects subtle.
Filters: Guiding Focus and Mood
- Use Gaussian Blur or Lens Blur to simulate depth of field and draw attention to key subjects.
- Apply the Camera Raw Filter for precise adjustments to clarity, contrast, and color grading.
- Add a hint of noise or grain to blend photographic sources and soften overly sharp edges.
Creative Finishing Touches
- Add a vignette to gently frame your subject.
- Apply selective sharpening to highlight important textures and details.
- Use color grading or split toning to define mood — from cinematic warmth to cool minimalism
Bringing It All Together
- Focus on cohesion, not correction—every tweak should serve the visual flow.
- Keep adjustments balanced and intentional to avoid over-processing.
- When textures, filters, and tones work in harmony, your image will feel complete—polished, expressive, and unified.
Discover Adobe's suite of products.

From Practice to Mastery: Tips for Consistent Results
Mastering compositing in Photoshop isn’t just about tools—it’s about building a workflow that blends creativity with consistency. Start every project with intention: plan your concept, organize layers clearly, and save incremental versions to track progress.
Work non-destructively using adjustment layers, masks, and smart objects. This keeps edits flexible and encourages experimentation without risk.
Grow through purposeful exploration—test new blend modes, lighting, and color techniques while studying how professionals achieve realism and cohesion.
Finally, push your creative limits. Use compositing not just to recreate reality but to imagine new ones. With discipline, curiosity, and consistent practice, you’ll develop a confident style that turns ideas into striking, polished visuals.
Discover Adobe's suite of products.